How to glue puzzles to hang a picture on the wall and save your efforts - TOP 7 ways
Content:
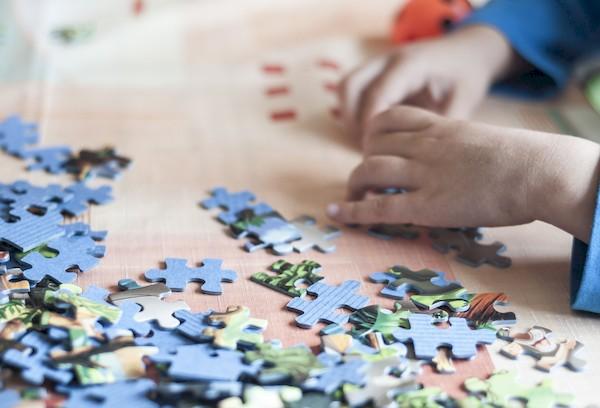
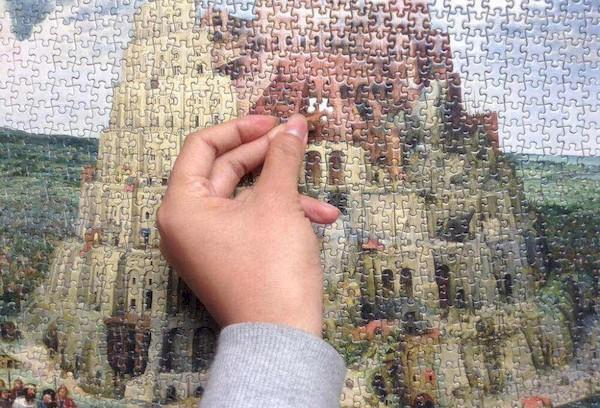
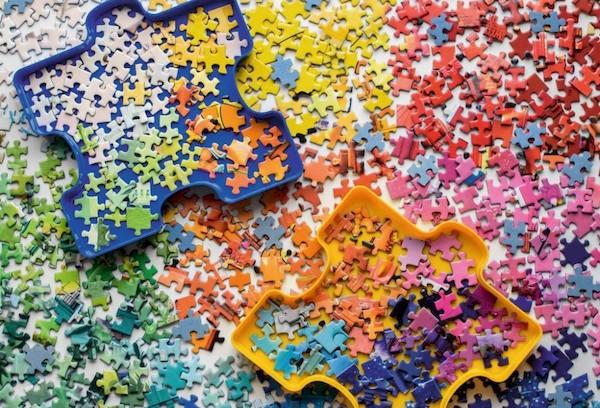
Assembling puzzles is a fun hobby that can help decorate your interior. True puzzle lovers prefer to save their works and hang them on the wall. First you need to carefully and firmly glue the puzzles together. The task is not at all difficult if you know the nuances and tricks. We offer a choice of 7 methods of gluing puzzles to obtain small pictures and large meter-long pictures.
Method 1 - with PVA glue
The first thing you should know about gluing puzzles:
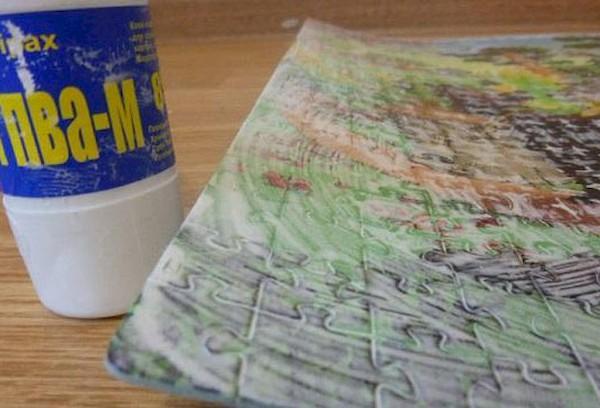
In most cases, puzzle pictures are glued from the front side. The glue is distributed in such a way that it covers all the recesses (joints of parts) and minimally stains the color image.
It is especially important to distribute the PVA glue well. After drying, it becomes transparent, but creates the effect of cloudy glass.
How to properly glue PVA mosaic:
- Assemble the puzzle on a sheet of cardboard or other support.
- Apply a small amount of PVA glue to the front side.
- Carefully spread the glue with a cardboard spatula or an old plastic card.
- Leave the mosaic to dry for 2-4 hours (preferably overnight).
Advantages and disadvantages of the method:
| Gluing puzzles with PVA glue | |
| pros | Minuses |
| Firmly glues puzzle pieces together | When applied to the front side it leaves a matte mark. Upon closer examination, cloudy stains may be visible. The richness of the colors of the picture decreases somewhat |
| Easy to use | Long drying period |
| Inexpensive | If there is excess glue, the parts will swell, the front side may turn out to be lumpy, and the canvas may bend like a wave. |
| After drying, it becomes transparent, which allows you to apply the composition to the front side. | Over time, the PVA adhesive film turns yellow and becomes cloudy |
| The picture becomes solid | |
Method 2 - tape
Some needlewomen masterfully use adhesive tape. It is better to glue the puzzle with tape in this order:
- Turn the assembled mosaic over with the pattern facing down.
- Apply a strip of tape horizontally. A little lower - another one. Step by step, cover the entire back with tape.
- For greater strength, glue vertical stripes.
- To protect the painting from dust and moisture, you can also stick tape on the front side. But you need to act very carefully: precisely join the strips of tape, make sure that the tape lies evenly and without bubbles.
- If bubbles still form, you can warm the mosaic with a hair dryer (hot air).
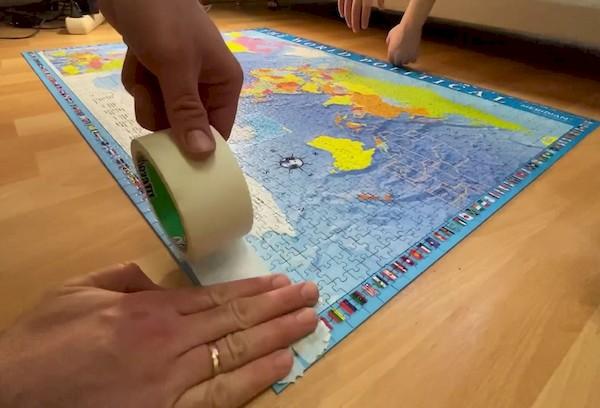
Advice. Before covering the puzzle with tape, blow it with a hairdryer to get rid of dust and lint.
The method has its pros and cons:
| Fastening the puzzle with tape | |
| pros | Minuses |
| Scotch tape securely holds parts together | The work may look sloppy: with air bubbles, noticeable tape joints |
| Creates a lamination effect and additionally protects the painting from moisture and dust | When applied to the front side it gives a glossy shine. |
| Inexpensive price | When gluing only the wrong side, parts may peel off |
| The picture turns out light and flexible | |
| Colors stay vibrant | |
Method 3 – with special glue
Almost every puzzle lover knows about a special glue that can be used to securely fasten puzzles without losing image quality. In Russia, the most common glue is “Glue for gluing puzzle” from JSC “Step Puzzle”. It can be purchased at stores that sell puzzles. The product is packaged in 80 ml polyethylene bottles. One bottle is enough to cover 4000 cm2 (paintings measuring 50 by 80 cm). The approximate cost of a tube is 50-60 rubles.
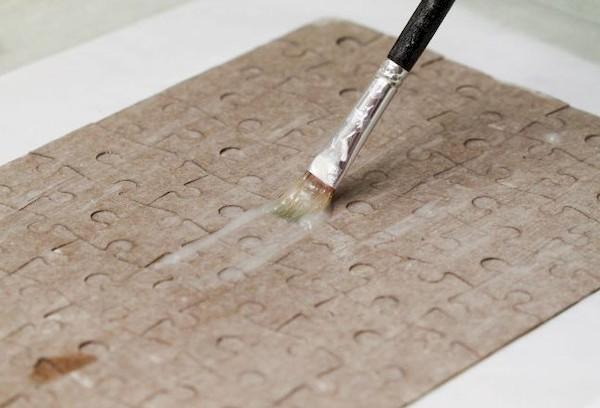
How to use the glue correctly is indicated on the packaging:
- Fill the mosaic with glue.
- Spread the mixture evenly with a cardboard spatula (or an old plastic card).
- Wait for the glue to dry completely (1.5-2.5 hours).
Advice. Special glue for puzzles is quite liquid and easily permeates the picture right through. Before gluing, you should place paper or film underneath so as not to stain the table.
Advantages and disadvantages of the method:
| Gluing the puzzle with special glue | |
| pros | Minuses |
| The picture remains bright, the adhesive film is completely transparent and invisible | Not sold in all stores |
| The glue gives a light, noble glossy shine, similar to a wax coating. | To glue large paintings you may need 2-3 tubes |
| The composition is easy to apply, quickly and evenly distributed | When applying glue in a thick layer, the painting may become deformed: swell in places, bend |
| The product is non-toxic, odorless | |
| Good adhesion, excellent when applying 2 layers | |
| Affordable price | |
Method 4 – using (making) a frame
To hang a puzzle picture on the wall, many puzzle lovers go to IKEA or Fixprice. In these stores you can choose a ready-made frame according to size.

Inserting a puzzle into a ready-made frame at home is not difficult:
- You need to loosen the fasteners.
- Take out the hardboard.
- Assemble a mosaic on it.
- Cover with glass.
- Turn over.
- Tighten the fasteners.
The second option is to contact a framing workshop. Here the frame will be made according to individual measurements. It will cost several times more.
Advantages and disadvantages of the method:
| Fixing the puzzle in the frame | |
| pros | Minuses |
| Reliable fastening of the mosaic | Expensiveness of the frame |
| The “cleanest gluing”: without glue, products are preserved in their original form | For very large puzzles you will have to order a frame from a framing workshop and wait 1-3 weeks for production |
| A framed picture on the wall looks stylish and expensive | |
| Mosaic does not get dirty and retains its original appearance for as long as possible | |
Method 5 – gluing to a sheet of fiberboard or cardboard
Thick cardboard and fiberboard are an inexpensive alternative to a special frame. You can fix large puzzle pictures on a sheet of fiberboard, and be sure that they will not bend or fall off.
Necessary:
- Cut a base of appropriate size from cardboard or fiberboard.
- You can make the base 3-7 cm larger around the perimeter, and cover the “fields” with paint or colored film (for example, gold or wood). Some craftsmen manage to make a frame from skirting boards and fix it with screws along the edges of the fiberboard.
- Place the assembled puzzle on the backing with the wrong side up.
- Apply an even thin layer of PVA glue to the fiberboard base and place it on top of the mosaic.
- Place the weight on top for 2-3 minutes.
- Iron the front surface with a soft cloth to remove excess glue.
- Wait for the painting to dry.
In the video, the puzzle pieces were glued together with a special glue, glued to a sheet of fiberboard and hung on the wall:
Second option: the mosaic was glued to the fiberboard with double-sided tape and a chic frame was made using a baguette and corners:
Pros and cons of this method:
| Gluing a painting onto a sheet of fiberboard | |
| pros | Minuses |
| Dense base that prevents the mosaic from deforming | Fiberboard makes the picture heavier |
| Attractive, laconic appearance of the picture | You will need a special tool to cut the base from a sheet of fiberboard |
| Preservation of color and texture | Not a very budget option if you buy materials |
| Reliable fastening of puzzles | |
| You can use scrap materials left over after the renovation. | |
Method 6 – self-adhesive film
Self-adhesive is used in much the same way as tape. It is glued to the outside of the puzzle. Instructions:
- Collect details into a picture.
- Turn face down.
- Cut out a rectangle the size of a picture from self-adhesive film.
- Peel off the protective layer of self-adhesive by 5-7 cm.
- Apply the sticky side to the mosaic.
- Smoothing the surface with a soft cloth, gradually remove the protective backing.
- Puncture any air bubbles with a needle and iron the film again.
Pros and cons of the method:
| Fastening puzzles with self-adhesive film | |
| pros | Minuses |
| The picture retains its full brightness and gloss | You need to be able to accurately and accurately glue the film. High risk of damage to the integrity of the puzzle |
| No need to wait for the glue to dry | If the base is not sticky enough, the puzzles may fall off |
| Relatively inexpensive price of consumables | |
| Beautiful backside | |
Method 7 - gauze or tulle
If there is a need to strengthen the strength of the glue, gauze or a piece of old tulle is glued to the wrong side of the assembled puzzle.
Necessary:
- Place the mosaic upside down on the film.
- Place gauze (tulle) on the second film.
- Lubricate with glue.
- Glue to the puzzle.
- Install the pressure until it dries.
Nuance. The gauze can be cut in advance to the size of the painting or not cut, but use the protruding edges to fix it on the stretcher.
Pros and cons of using gauze:
| Gluing a puzzle with gauze (tulle) | |
| pros | Minuses |
| Strengthens the adhesive strength | Auxiliary method. You will still need glue to glue the puzzle together. |
| Doesn't make the picture heavier | If there is too much glue, the mosaic may become wet and deformed. |
| You can fix the painting on a stretcher | |
Question answer
How to glue a large puzzle?
Each puzzle lover has his own method. The “cleanest” methods are considered to be the methods of gluing large puzzles using special glue, double-sided tape and assembly on a base for a frame. Pictures of 1000 puzzles or more have 2 vulnerable points - a tendency to bend under the influence of glue (especially PVA) and a tendency to break. If a frame with glass is not used, it is important to additionally fasten the picture on the reverse side with tape, self-adhesive film, fiberboard or cardboard.
How to turn a puzzle over to glue it together?
For gluing with PVA glue and special glue, it is not necessary to turn the mosaic over. They are usually applied from the “face”. If such a need arises, you should carefully move the picture onto a sheet of fiberboard or glass. Place the second glass (fibreboard) on top. Clamp the mosaic and turn the “sandwich” over. If the puzzle is very large, it will be more convenient to divide it into 2 parts, turn it over, and then put the parts together.
How to glue a wooden puzzle?
You can use PVA wood glue, Moment glue (suitable for wood), hot glue or universal Titan glue. But usually they try not to stain wooden puzzles with adhesives. Wooden parts are fastened using double-sided tape or self-adhesive film.
Which glue is best?
The best glue for puzzles is considered to be the best. In second place is PVA glue. Other types of adhesives (for wallpaper, universal and others) can corrode the paint and leave a noticeable whitish mark.
Every puzzle lover sooner or later comes up with the idea of gluing a mosaic together and hanging it on the wall. There are many options with a small painting: you can glue the parts together with glue, or use tape, or use a piece of paper. Then the creation can be glued to the wall with Velcro or hung from a loop. With heavy, large paintings everything is much more complicated. The easiest option is to choose an inexpensive ready-made frame. It may even be a little larger. The void is covered with whatman paper, and glue is not needed at all.