How to choose and sew a ribbon to a curtain?
To refresh the interior, you don’t have to undertake a full-scale renovation or replacement of furniture. Decorating with new textiles - curtains and curtains - will help give completely different accents to any room. Many housewives, when buying new fabric for draping windows, prefer to decorate them themselves, including hemming with a special tape. To do this correctly, you must:
- calculate the length of the curtain tape;
- adjust the sewing machine taking into account the density of the curtains;
- sew on the braid without seating.
And if the first two steps are not difficult to complete, then the third - the correct seam - requires experience in sewing. Therefore, before sewing curtains from expensive fabric yourself, it is advisable to practice on a simpler tulle, taking into account the tips outlined below.
How much and what kind of braid should I buy?
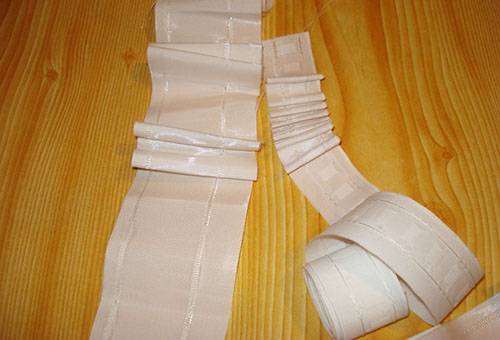
Calculating the length of the curtain tape depends on two parameters: the width of the window opening and the type of tape itself. The type of braid is also taken into account when purchasing curtains, since this will determine how much it will gather and what width will be the result. There are many styles of assembly: cylindrical, uniform, triple, bow, bouffant, butterfly and others. To figure out what fold will be the result, you don’t need to know all the names. Simply pull the tape and the assembly pattern will immediately appear. It will look exactly the same on a curtain.
When choosing the type of assembly, you need to take into account its coefficient. It can be 1:1.5, 1:2, 1:2.5 or 1:3.If the first number is taken as 1 meter, then the second will indicate how much fabric is needed to cover 1 meter of window opening. For example, when buying a ribbon for curtains with a bow fold and a ratio of 1:3 for a window three meters wide, you need to purchase 9 meters of tulle and the same amount of braid.
If the curtains have already been purchased, then you need to select a braid with a suitable coefficient. To do this, you need to divide the width of the fabric by the width of the opening. For example, if you have a curtain 4 meters wide, and the window opening is 2, then you need to divide 4 by 2. The result is 2, which means the ratio should be 1:2.
Advice
When calculating the length of the braid and the width of the curtains, take into account not only the opening itself, but also the space near it that is supposed to be covered. In addition, you need to take into account that some fabrics stretch a little when sewn, so you need to buy braids 10-15 cm more than the estimated length.
In addition to the coefficient and type of assembly, the tape differs in the following parameters:
- width,
- density,
- transparency,
- number of levels for hooks.
For curtains - tulle, organza - or for curtains made of light, translucent fabric, transparent braid is suitable. The wider it is, the more impressive the assembly will look after hemming. On the contrary, opaque is suitable only for dense fabrics.
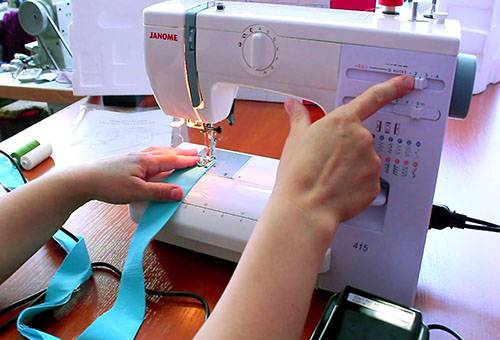
Setting up a sewing machine
To properly set up a sewing machine, it is advisable to use a piece of the same material on which the tape will be hemmed, and the threads that will be used in the work. Having folded the fabric in half, you need to make a test stitch and see the result. If the seam is even, no loops are visible on either side, and the fabric is not gathered, no additional adjustment is needed - you can start working.Otherwise, you need to adjust the thread tension or the degree of presser foot pressure.
If, when stitching, the fabric turns out to be gathered, this may indicate excessive or insufficient pressure of the presser foot on the fabric. Most often, this problem occurs if thin fabrics such as organza are used. To eliminate the problem, you need to set the adjustment lever to the desired position. For tulle it is set to position “1”, for thick curtains – “3”.
A seam that is too loose with tangled threads along the bottom of the fabric indicates that the top thread tension is too loose. In this case, you need to tighten the tensioner. If nodules are visible along the top seam, adjust the same tensioner, but loosen it. The tensioner on the bobbin (bottom thread) must not be touched. It can only be adjusted by a master or a person with extensive experience.
Advice
For those new to sewing, it will be easier to understand what the problem is if you use different colors of thread from the color of the fabric. Then the finished seam will show which thread is “problematic”.
Hemming the tape
After setting up the machine, you can start working. If threads of different colors were used for the test seam, they must be changed. For hemming curtains, threads in the same tone as the curtains themselves are ideal. But if they are absent, you shouldn’t be upset either; you can choose any that are similar in tone. The main thing is that they are not lighter than the fabric. The thread number is selected according to the type of fabric, and the needle is set according to the threads.
| Fabric type | Thread number | Needle number |
| Thick linen fabric | 20 | 100-120 |
| Thick cotton fabric | 30 or 40 | 95 or 100 |
| Thick synthetic fabric | 40 | 95 |
| Thick silk | 50 | 85 or 90 |
| Thin cotton | 50 or 60 | 70-90 |
| Tulle | 60 | 60-65 |
| Organza | 60 or 80 | 60-65 |
After threading, in order to sew the ribbon correctly, you need to perform actions in a certain sequence.
- A fold of 1.5-2 cm is made on the wrong side of the fabric and ironed.
- The tape is placed on the prepared fabric (on the wrong side) so that it is not visible from the front side. That is, it needs to be sewn 0.3-0.5 cm below the edge of the fabric. If you need the curtain to cover the cornice, then the tape is lowered even lower. A reserve of tape is left at the edges, and the cords are secured with a knot so that they do not “run away”.
- Next, you can baste the ribbon and tulle, and if you already have experience in sewing things, you can do without this step. Instead, you can pin the ribbon with sewing pins.
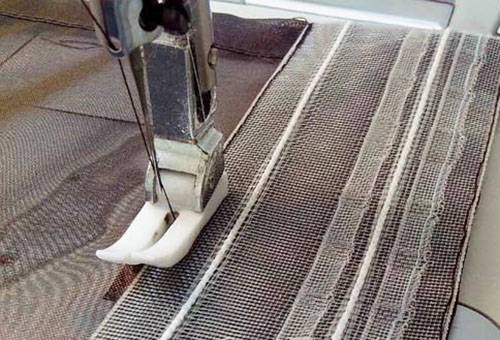
- The next step is to stitch the top seam. It should be located a few millimeters below the edge of the braid. During the stitching process, you need to make sure that the fabric does not stretch or wrinkle.
- After this, the pins need to be pinned along the line of the bottom seam - a few millimeters above the edge of the tape.
- When sewing the bottom seam, you need to carefully ensure that it is without a fit. This is precisely why pins are pinned - they serve as a guide and will show in time that the fabric, as it stretches, “moves out”. To prevent this from happening, it is necessary to feed the ribbon and fabric evenly under the needle.
- The final stage is tucking the edge of the tape. If the fabric has not stretched and there is still some tape left, it is cut off. The edges of the tape need to be tucked in and sewn along the side seam of the tulle or curtains.
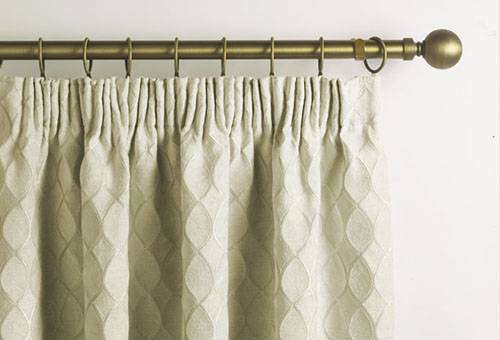
After all sewing operations are completed, the cords (cords) are pulled together. As a result, the ends of the cords hang almost the entire length of the curtains. It is not advisable to cut them: when washed, they unravel so that dirt does not collect in the folds.In addition, if suddenly circumstances develop such that you have to hang the curtain on another, wider window, the tie will have to be loosened, and then the length of the cords will not be enough. A good solution is to sew bags for cords along the edges of curtains from curtain fabric or from a piece of tape. Another option is to wrap the cords on pieces of thick paper and pin them to the braid.
Nothing. Where is the photo or drawing? Fold back and iron the fabric... Are you serious? All 12 meters?